
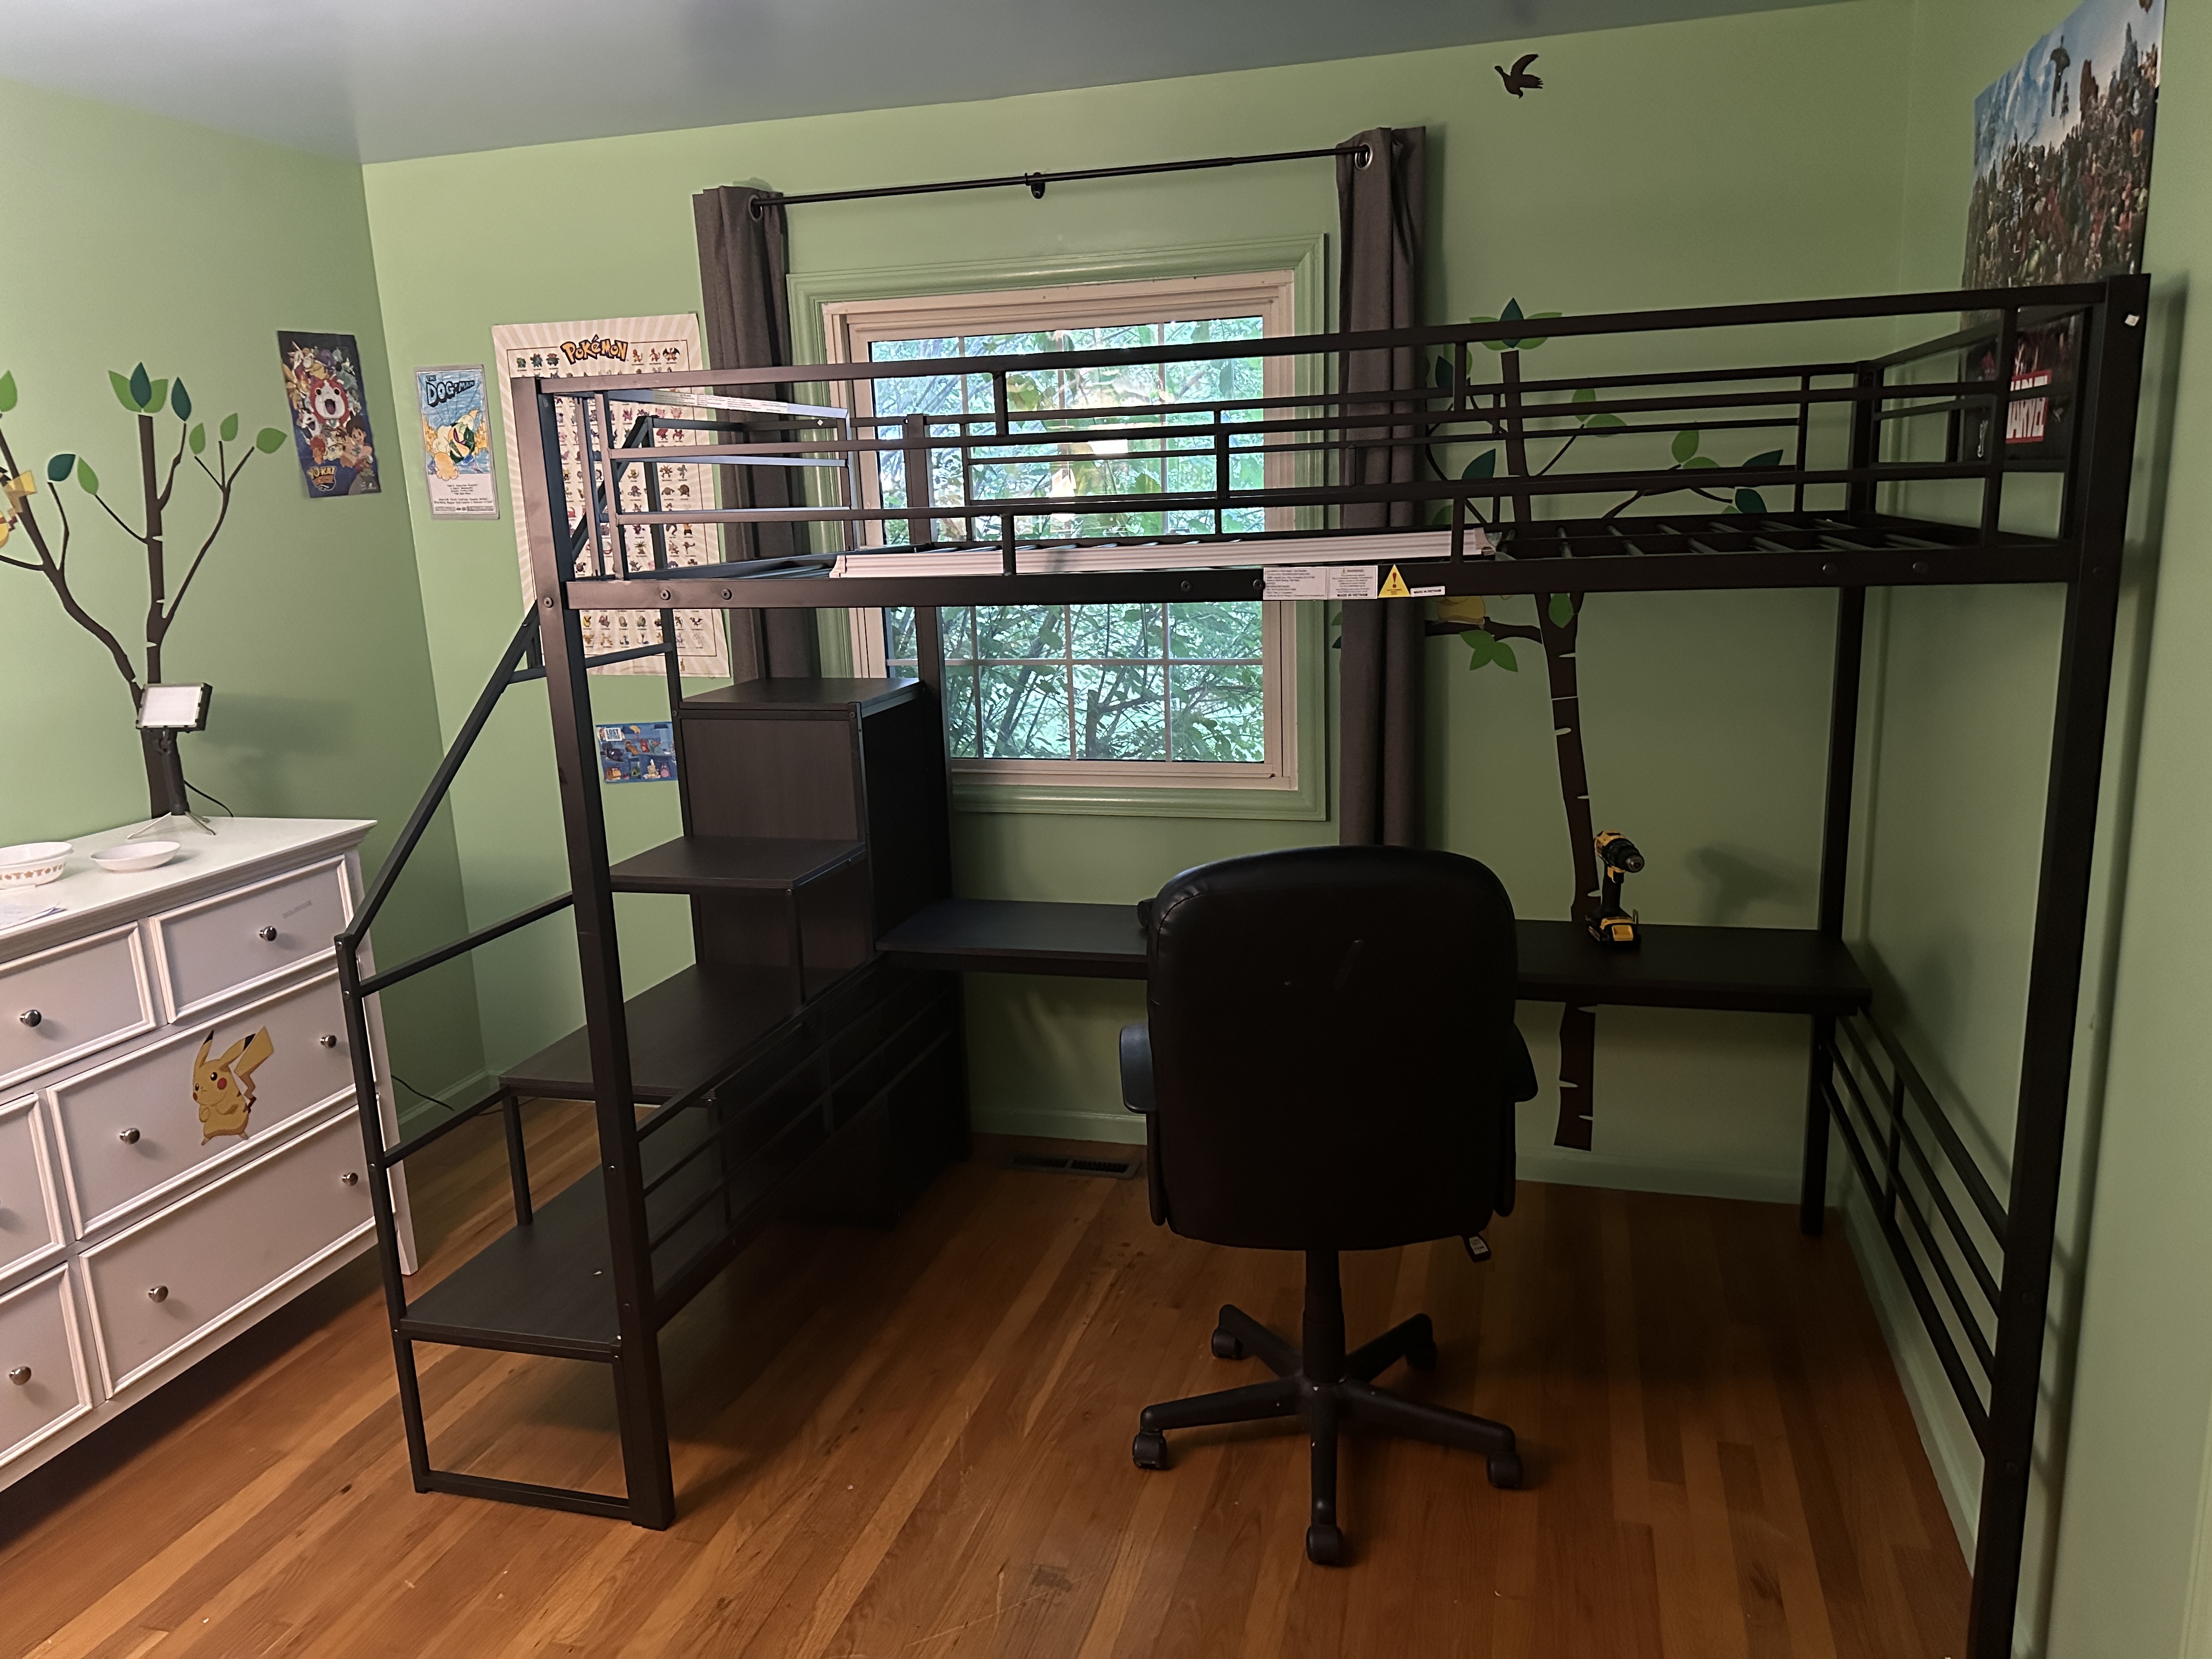
The new bed is fully in place, and the new mattress is going to arrive tomorrow, so depending on how long it takes for it to decompress from the tiny box they’ve stuffed it into he ought to be sleeping back in here by mid-week next week at the latest. I have a couple of observations about putting this bed together, if you don’t mind indulging me:
First, the build quality of the bed itself is really impressive. The whole thing is steel and decent-quality particle board; there was a small dent in one of the pieces of wood because the box took a hit at some point during the delivery process, and we’re going to see if we can get them to send us a new one, but I was able to hide it and it’s not going to make any kind of difference structurally. Everything went together really easily, all the predrilled holes in the metal pieces were in the right places, the welded joints feel strong, and once I went through and tightened all the bolts (suggestion: install everything with your hands to finger-tight and then go back with a drill once you’re certain everything fits right) it just feels rock-solid. It’s not making any noises or squeaking or anything and it just feels like it should have cost more than the slightly-over-$300 we paid for it. There may have been a bag of screws missing from the hardware box– I say “may have been” because it’s entirely possible we lost it during the unpacking process, but I really don’t think that’s what happened, because I was being careful. At any rate, a trip to Lowe’s solved the problem for an extra $5 worth of screws. Whatever.(*)
Let’s talk about the instructions, though. And if you think I’m about to complain about something translated from Chinese, think again. There are almost no actual words in the instructions, I assume specifically because they wanted to avoid translation issues. That said? The instructions suck. They get piece numbers wrong a few times– one page had a couple of part numbers handwritten in it, and even then they were wrong– and there are a couple of deeper issues as well.
One, this bed is reversible, which one would think would be a selling point– by which I mean that the stairs can go either on the right or the left of the bed itself, and once you figure out what you’re looking at it’s easy to figure out that, okay, if this goes here instead of here, that’s why this seems to have extra holes in it. But the instructions never mention this! In fact, the diagrams show the stairs on both sides and in both orientations at various points with no indication that anything has changed, which as one could imagine, can lead to some confusion to those not paying careful attention. I am proud to say that I made only one build error– that bottom three-part rail on the right side was initially put in upside-down, which was not the instructions’ fault and was easily fixed. But I’m generally pretty good at this kind of thing. If you’re not used to it, the moving stairs are gonna be a problem.
And, well, there’s this, too. Take a second and look at this diagram carefully before you keep reading:
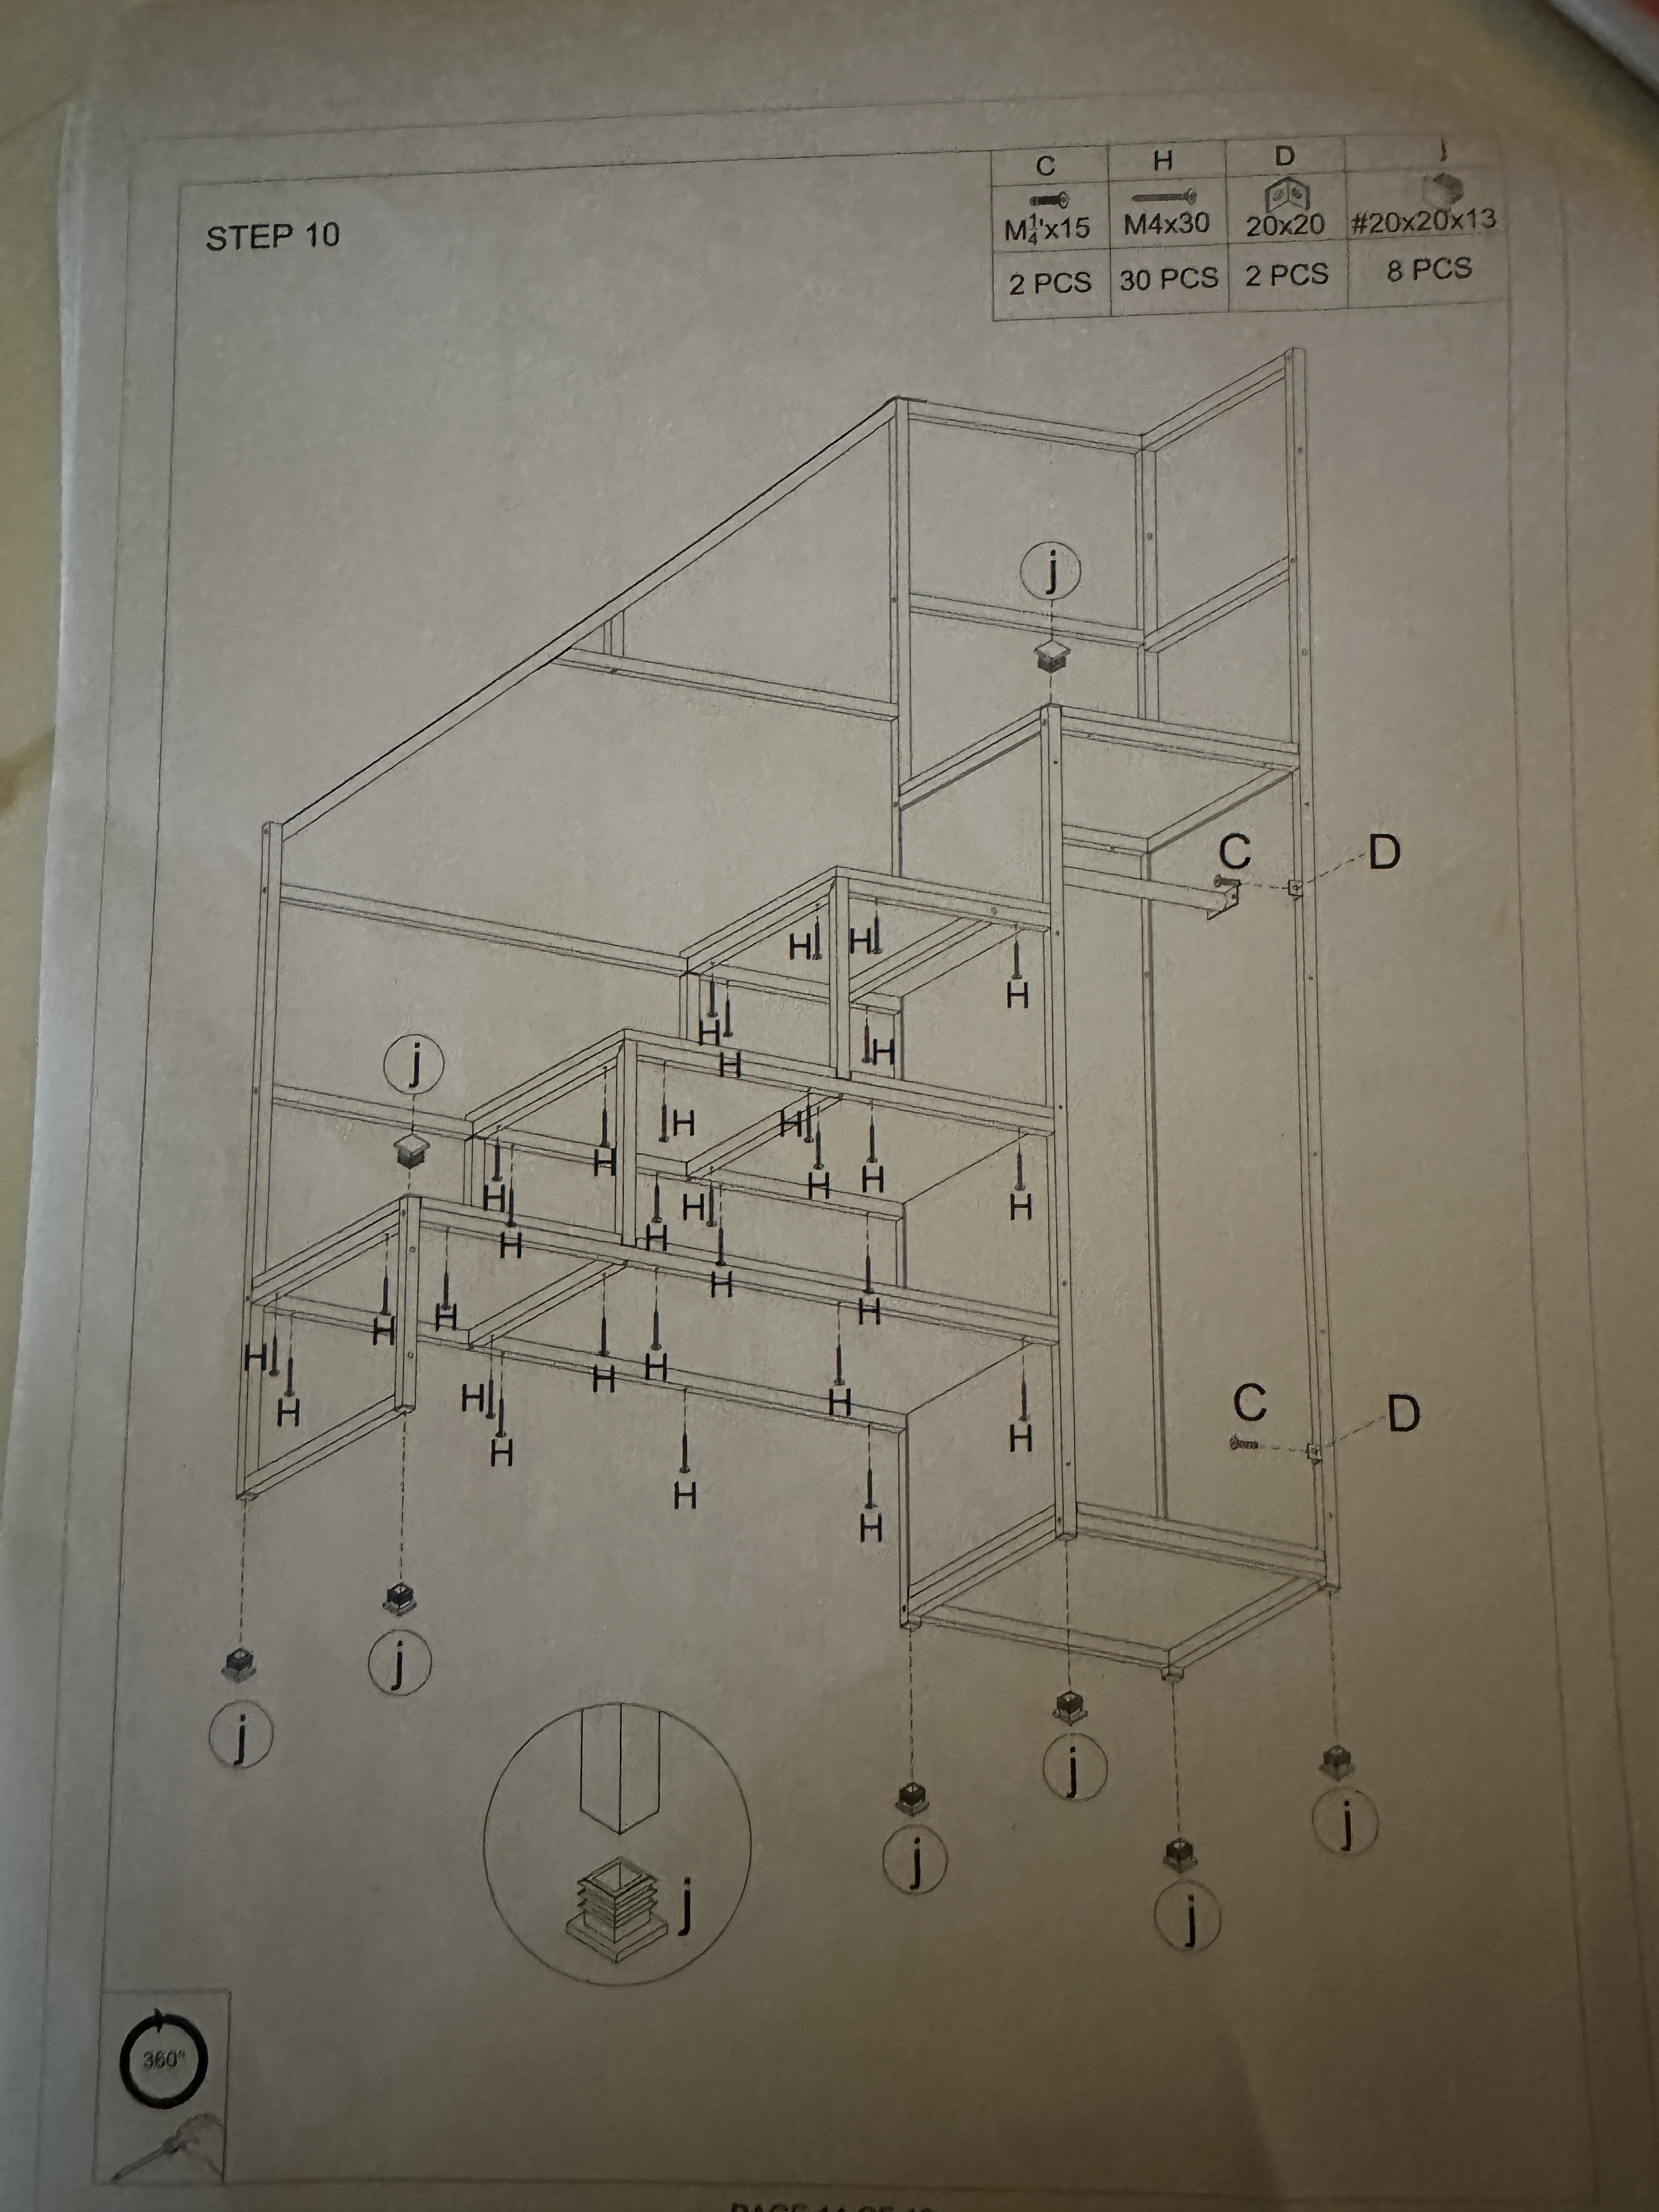
Look at the bottom part of the diagram. Am I going blind, or is there some sort of haywire M.C. Escher shit going on with the directionality of the bottom third of this diagram? Like, these lines don’t line up correctly, right? This is apparently looking up from underneath the stairs, and I can’t put my finger on what’s wrong but I also just can’t parse it.
The good news is that all you really need to be realizing from this diagram is 1) put feet in the feet-holes, 2) screw all of the pieces of wood onto the frame, and 3) put those little brackets on the side of the hangar cubby, which– right– I did screw two things up, because I used the wrong bolts there and, uh, had to have my wife get two more from Lowe’s. But this fucking diagram is terrifying if you’re already not confident about how to put this type of thing together, and I’m genuinely not convinced that the actual diagram itself matches physical reality properly.
One way or another, though, the boy has a new bed, and once the mattress goes in and I get his whiteboard put up on the side there and, Christ, some more lighting– note that I had to pull some of my spotlights from my year of teaching at home to help me out in the top picture– I think the room will be good until he decides the trees and Pokémon are too little-kiddy and we need to repaint again. One way or another, I hope he likes the loft, because it’s never leaving that room.
(*) My wife, who actually got the job of having to buy the right screws, might disagree with my “whatever” here, just for the record.

